Galentine's Red Velvet Cheesecake
Highlighted under: Sweet Dessert Recipes
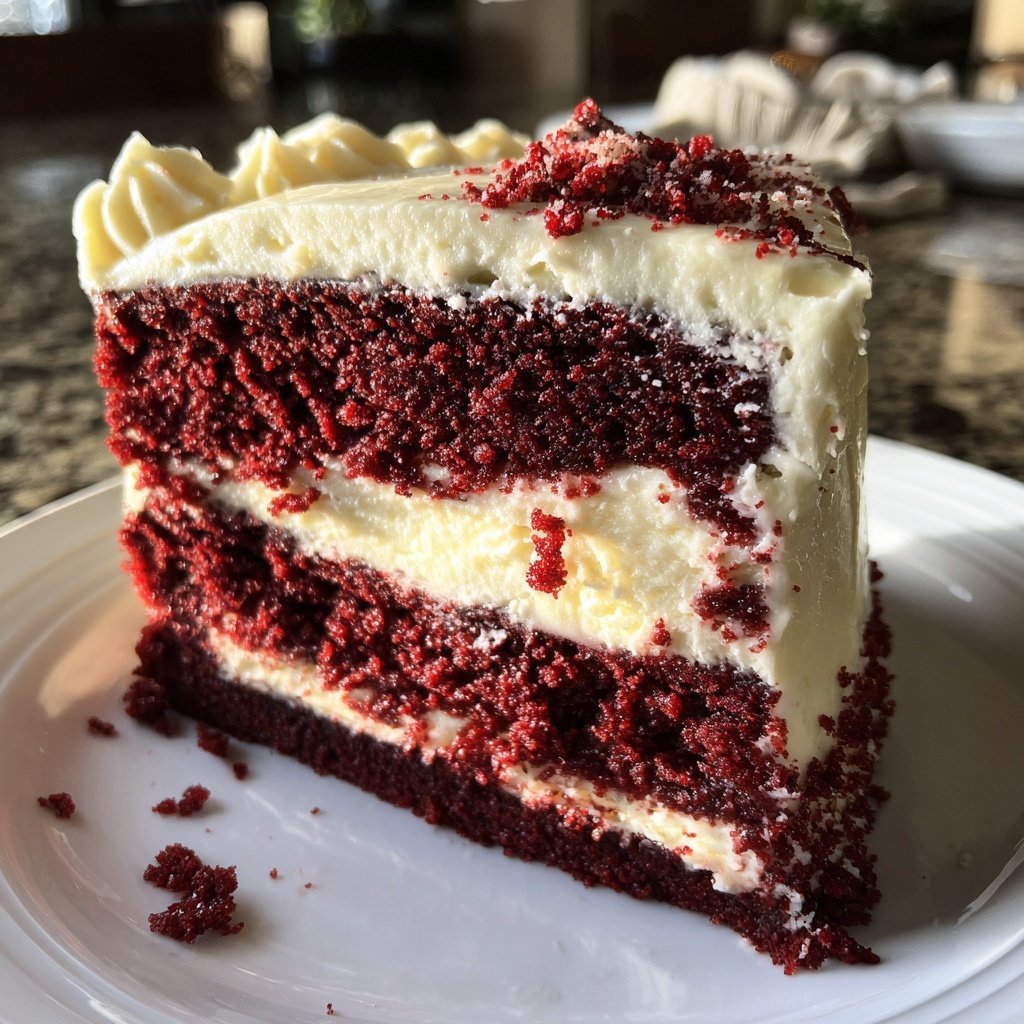
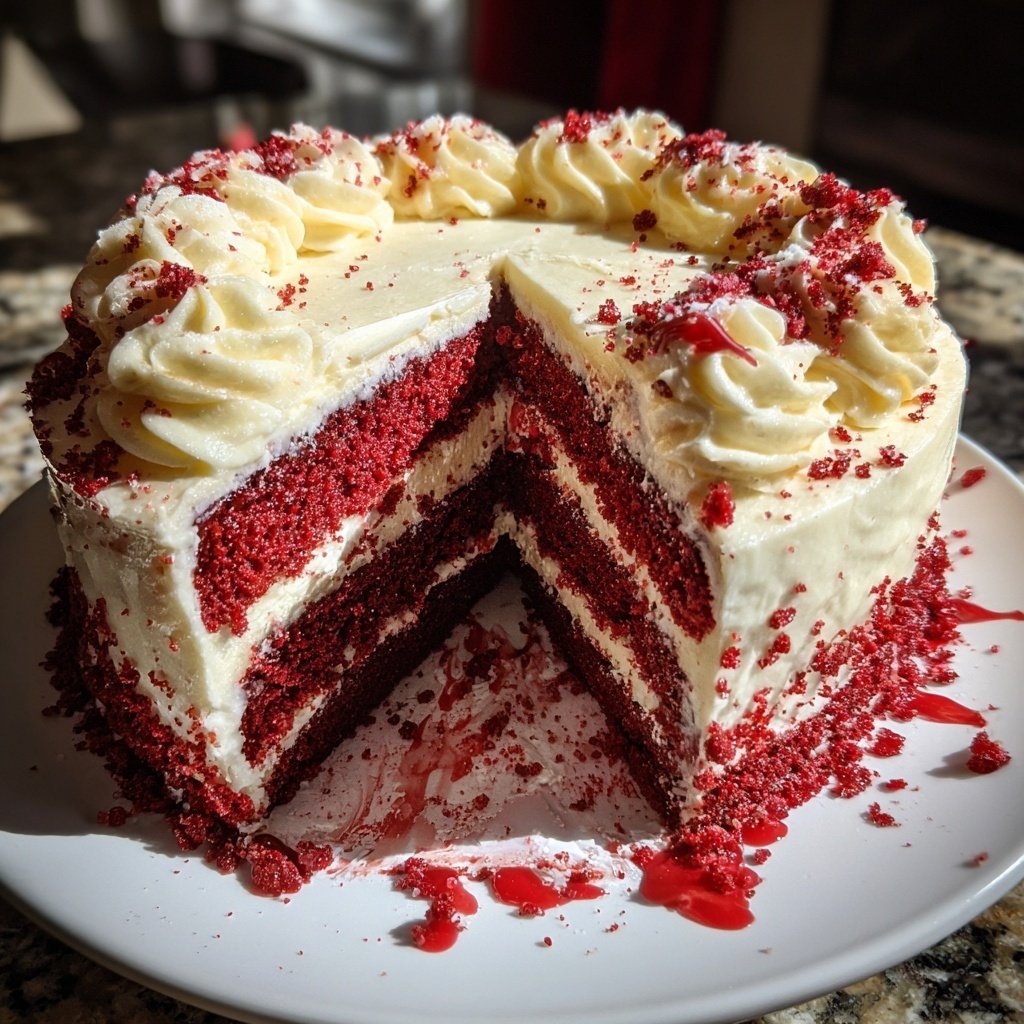
I absolutely love hosting Galentine's Day celebrations with my friends, and this Galentine's Red Velvet Cheesecake has become the star of the show! It's rich, velvety, and the perfect blend of classic flavors that everyone adores. Preparing this cheesecake is a delightful way to show my friends how much they mean to me, and I enjoy decorating it with fresh berries and whipped cream. The gorgeous red color is just as inviting as its delicious taste, making it a must-try for any celebration with the girls.
When I first made this Galentine's Red Velvet Cheesecake, it was a freezing February afternoon, and I was craving something indulgent and comforting. After experimenting with different cheese and frosting combinations, I found the perfect blend that balances richness with a lightness thanks to the cream cheese. It's important to let the cheesecake cool slowly in the oven after baking, as this helps prevent cracking on the surface.
Moreover, I discovered that chilling the cheesecake overnight enhances the flavors significantly. I usually serve it garnished with fresh berries and a drizzle of chocolate, which adds a touch of elegance. This cheesecake has become one of my favorite desserts to share, and it always brings smiles to the table!
Why You'll Love This Recipe
- Decadent layers of cheesecake that melt in your mouth
- Beautiful red hue that brightens any celebration
- Perfectly balances sweet and tangy flavors
Perfecting Your Red Velvet Cheesecake
The red velvet cake mix forms the soulful base of this cheesecake, imparting both flavor and a striking color. Choose a high-quality mix for the best results, as not all brands are created equal. I recommend checking ingredients; some mixes include additional leavening agents that could affect the cheesecake's texture. For a homemade variation, you can replace the store-bought mix with your own combination of flour, cocoa powder, and buttermilk to achieve that classic red velvet taste.
When mixing the batter, ensure that all ingredients are at room temperature. This helps to avoid lumps in the cream cheese, leading to an even, creamy texture. Mixing should be done at medium speed until the mixture is smooth and glossy, which generally takes 3-5 minutes. If you notice any lumps, you can use a hand mixer to incorporate the batter smoothly. Keeping the mixing time consistent helps achieve a luscious cheesecake that doesn't crack during baking.
Frosting Tips and Decoration Ideas
For the frosting, using room temperature cream cheese and butter is crucial for a smooth and creamy texture. Beat them together until fluffy, which typically takes around 3-4 minutes. Gradually adding the powdered sugar prevents clumping, ensuring a beautifully silky frosting. If your frosting is too thick, you can add a teaspoon of milk at a time until the desired consistency is reached, making it easier to spread and decorate as you like.
Decorating your cheesecake can be as simple or lavish as you want. Fresh berries such as raspberries or strawberries not only enhance the visual appeal but also add a delightful tartness that complements the rich cheesecake. I personally love to drizzle a bit of raspberry sauce or chocolate over the top to create an attractive serving presentation. Remember, chilling the cheesecake beforehand allows the frosting to set, making it easier to cut clean slices.
Ingredients
For the cheesecake
- 2 cups red velvet cake mix
- 1 cup cream cheese, softened
- 1/2 cup granulated sugar
- 1/4 cup brown sugar
- 1/2 cup sour cream
- 2 large eggs
- 1 tsp vanilla extract
- 1/4 cup unsweetened cocoa powder
For the frosting
- 1 cup cream cheese, softened
- 1/2 cup butter, softened
- 2 cups powdered sugar
- 1 tsp vanilla extract
- Red sprinkles for decoration
Instructions
Prepare the crust
In a mixing bowl, combine the red velvet cake mix, eggs, and vegetable oil. Mix until well blended, then press the mixture into the bottom of a greased springform pan.
Make the cheesecake batter
In another bowl, beat cream cheese, granulated sugar, brown sugar, and sour cream until smooth. Add eggs one at a time, mixing well after each addition. Stir in vanilla extract and cocoa powder.
Combine and bake
Pour the cheesecake batter over the red velvet crust in the springform pan. Bake in a preheated oven at 325°F (160°C) for about 60 minutes. Turn off the oven, crack the door, and let the cake cool inside for another hour.
Chill and frost
Refrigerate the cooled cheesecake for at least 4 hours, preferably overnight. Once chilled, prepare the frosting by beating together cream cheese and butter, then gradually adding powdered sugar. Frost the cheesecake and decorate with red sprinkles.
Serve and enjoy
Slice the cheesecake and serve it chilled, enjoying the wonderfully smooth texture and rich flavor.
Pro Tips
- For an extra layer of creaminess, consider adding a layer of vanilla or chocolate ganache on top before frosting.
Make-Ahead and Storage
This cheesecake is an ideal make-ahead dessert, as it tastes even better after resting in the fridge. You can prepare it a day in advance, allowing the flavors to meld beautifully. To store, simply wrap the cheesecake with plastic wrap or place it in an airtight container. It will keep well for up to 5 days in the refrigerator. If you need to store it longer, consider freezing it. Wrap the cheesecake tightly and freeze for up to three months; just be mindful not to add the frosting until you're ready to serve.
When you're ready to enjoy your frozen cheesecake, transfer it to the refrigerator the night before to thaw slowly. Avoid thawing it at room temperature to prevent moisture from affecting the texture. After thawing, add your frosting and decorations just before serving for a fresh look and taste. This makes it a great option for unexpected guests or special celebrations!
Serving Suggestions
Once your Galentine's Red Velvet Cheesecake is ready, slice it into wedges and serve it with a dollop of whipped cream for an extra indulgent touch. You can also pair it with a scoop of vanilla ice cream or a tart berry sorbet to balance out the richness. If you’d like to turn this dessert into a more casual treat, consider serving it in individual cups or jars layered with whipped cream and crushed cookie crumbs for a fun twist.
For a celebratory touch, garnish each slice with a sprinkle of edible glitter or a few chocolate shavings. This not only boosts the visual appeal but also adds a hint of sophistication. Pairing this cheesecake with a fruity cocktail or a glass of bubbly can elevate your Galentine's Day get-together, making it a memorable celebration that your friends will be raving about!
Questions About Recipes
→ Can I use a different cake mix flavor?
Yes, you can try different flavors of cake mix, but the classic red velvet is a favorite!
→ How long does the cheesecake last?
It can be stored in the refrigerator for up to 5 days.
→ Can I make this cheesecake ahead of time?
Absolutely! This cheesecake actually tastes better the next day after the flavors have melded.
→ Is it necessary to chill the cheesecake overnight?
Yes, chilling overnight helps set the cheesecake and enhances its flavor.
Galentine's Red Velvet Cheesecake
Created by: The Platedroots Team
Recipe Type: Sweet Dessert Recipes
Skill Level: Intermediate
Final Quantity: 12 servings
What You'll Need
For the cheesecake
- 2 cups red velvet cake mix
- 1 cup cream cheese, softened
- 1/2 cup granulated sugar
- 1/4 cup brown sugar
- 1/2 cup sour cream
- 2 large eggs
- 1 tsp vanilla extract
- 1/4 cup unsweetened cocoa powder
For the frosting
- 1 cup cream cheese, softened
- 1/2 cup butter, softened
- 2 cups powdered sugar
- 1 tsp vanilla extract
- Red sprinkles for decoration
How-To Steps
In a mixing bowl, combine the red velvet cake mix, eggs, and vegetable oil. Mix until well blended, then press the mixture into the bottom of a greased springform pan.
In another bowl, beat cream cheese, granulated sugar, brown sugar, and sour cream until smooth. Add eggs one at a time, mixing well after each addition. Stir in vanilla extract and cocoa powder.
Pour the cheesecake batter over the red velvet crust in the springform pan. Bake in a preheated oven at 325°F (160°C) for about 60 minutes. Turn off the oven, crack the door, and let the cake cool inside for another hour.
Refrigerate the cooled cheesecake for at least 4 hours, preferably overnight. Once chilled, prepare the frosting by beating together cream cheese and butter, then gradually adding powdered sugar. Frost the cheesecake and decorate with red sprinkles.
Slice the cheesecake and serve it chilled, enjoying the wonderfully smooth texture and rich flavor.
Extra Tips
- For an extra layer of creaminess, consider adding a layer of vanilla or chocolate ganache on top before frosting.
Nutritional Breakdown (Per Serving)
- Calories: 380 kcal
- Total Fat: 26g
- Saturated Fat: 15g
- Cholesterol: 195mg
- Sodium: 85mg
- Total Carbohydrates: 32g
- Dietary Fiber: 3g
- Sugars: 24g
- Protein: 6g